onscan.js - Using onscan to build a barcode web scanning application
Using onscan.js to create a SPA (Single Page Application) to barcode receipt / reject laboratory Covid19 samples at scale.
Table of Contents
↑Introduction
Need to develop a web application that supports barcode scanning? In this article, I’ll give you some advice and design decisions to consider to help you make your barcode scanning application a success.
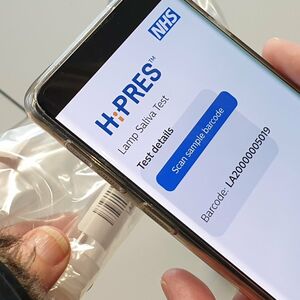
I developed an application to scan barcode’s on Covid19 samples. The application allowed laboratory check-in staff to scan the barcode and verify that it was a valid sample.
The barcode was initially scanned by Bridge Head’s HiPRES mobile application as the user provided and registered the sample. By the time the sample reached the laboratory, the barcode would be registered in the central database.
The lab then had the option to either accept the sample for processing or reject the sample based on predefined reasons. A sample could be rejected because there was insufficient specimen material or if the sample had leaked.
The lab receipting computer stations would be processing upwards of 80,000 samples a week, so I had to design the software to accommodate this throughput.
Due to the volume, I decided to make the interface only operate through the handheld scanner. Meaning the operator wasn’t constantly switching between holding the Honeywell barcode scanner and interacting with the computers keyboard/mouse.
I created unique barcode’s for the accept command and one for each of the rejection reasons. These were printed and laminated onto a control card located at the receipting desk. Allowing the operator to scan the sample, and scan the barcode which matched the action they wanted to perform.
↑SPA Frontend
As the lab receipting workstations were dedicated to barcode scanning it made sense to deliver this application as a SPA (Single Page Application) which could be launched in kiosk mode within a web browser.
The interface needed to be clean and intuitive, meaning no input controls. In effect, the whole document was the user interface.
Most handheld barcode scanners act as a virtual keyboard when plugged into a computer. Controls like input boxes can receive the input as though the value has been pasted into the field. The key was determining which stream of keyed input had come from the barcode scanner as opposed to any keys accidentally touched on the keyboard.
After some research I found onscan.js, an open-source JavaScript library which attempts to distinguish between regular input and scan input by measuring input speed. If a scan is detected, it triggers a custom JavaScript event called scan for the DOM element specified during startup. After reviewing the library and performing stress tests, I decided to utilise it within the application. It has a liberal open-source MIT license making it free to use within this project.
↑Attaching onscan.js to the DOM
The attachScanner function is used to attach the onScan API to the whole document. If the onScan API detects a barcode being scanned, then the onScan function is invoked passing the barcode value within the sCode variable.
 1function attachScanner() {
 2    if (onScan.isAttachedTo(document) == false) {
 3        onScan.attachTo(document, {
 4            suffixKeyCodes: [13],
 5            reactToPaste: false,
 6            onScan: function(sCode, iQty) {
 7                // business logic to
 8                // process a scanned
 9                // barcode goes here
10            }
11        });
12    }
13}
↑Using the onScan event
The code example below shows how the scanned barcode value is checked to make sure it starts with the string literals LA20 or LA21 as a validation check on the known prefixes used for this project. The checkBarcode function contains the AJAX call to the Go backend to check if the barcode is valid. The function is wrapped within a double request Animation Frame statement so that the application can animate a progress bar and change the text of a status message before the database API call is performed. This allows the CSS changes to be reflected immediately without the blocking function call checkBarcode() preventing the changes to be rendered.
 1if (onScan.isAttachedTo(document) == false) {
 2    onScan.attachTo(document, {
 3        onScan: function(sCode, iQty) {
 4            if (sCode.startsWith('LA20') || sCode.startsWith('LA21')) {
 5                requestAnimationFrame(() =>
 6                requestAnimationFrame(function(){
 7                    checkBarcode(sCode);
 8                }))
 9            }
10        }
11    });
12}
↑Network connectivity
As part of the application I built in a network connectivity check so that the barcode scanning feature could be disabled if the network wasn’t available. By setting up an EventListener you can check the status of the navigator.onLine web API call to determine if the network status has changed.
1window.addEventListener("load", () => {
2    hasNetwork(navigator.onLine);
3    window.addEventListener("online", () => {
4        hasNetwork(true);
5    });
6    window.addEventListener("offline", () => {
7        hasNetwork(false);
8    });
9});
Within the HTML file we have a DIV at the top of the page which is used to report the network status to the user.
1<div id="network"></div>
The function hasNetwork is then used to either attach/detach the onscan API. It’s also used to change the background colour of the network DIV and change the text to an appropriate message.
 1function hasNetwork(online) {
 2    const element = document.getElementById('network');
 3    if (online) {
 4        attachScanner();
 5        element.style.backgroundColor = 'green';
 6        element.innerText = "Network Online";
 7    } else {
 8        detachScanner();
 9        element.style.backgroundColor = 'red';
10        element.innerText = "NETWORK OFFLINE! PLEASE CHECK CONNECTIVITY";
11    }
12}
↑Go Backend
The backend of the application was written in Go and packaged as a single AWS Lambda function deployed to an AWS application load balancer, which the laboratory was granted access to.
The reason for choosing Lambda was that while 80,000 samples a week sounds a lot, the traffic wasn’t evenly distributed across the week. For large parts of the day, the application would be idle, and as samples were couriered in from across the region then there would be a burst of intense activity as they were checked it.
Lambda gave us the ability to have low costs, as you don’t pay for idle time, unlike having a traditional web server. By utilising Lambda we also got scalability for free to meet the sudden burst of traffic.
By not having a tradition web server set-up we simplified our architecture and reduced our patching and maintenance overhead.
As this was a single page application, all the image assets were base64 encoded into the HTML page. The CSS and JavaScript required to run the application were also included in the index.html file.
The index.html file was then gzip-compressed and injected into the Go project using the go-bindata tool. This allowed the whole application to be packaged into a single .ZIP file with no external dependencies.
↑Need Help or Advice
If you need any help or advice in setting up onscan.js within your web application, then please send me a direct message on Twitter, I’d be happy to help.